2013-04-23 Workshop In The Clouds

I was preparing to apply a coat of varnish to some shelves out of the aft cabin when realized how lucky I am to have such a scenic workshop. Granted it is open to the weather a bit more than I would prefer but perhaps that is part of its charm. As you can see we live in a 11th floor condominium in Arlington, VA. The pictures truly do not do the view justice but what a gift to see the world from this vantage point.  The good and the bad. We are close enough to the Pentagon that on 9-11 the inside of the house smelled of smoke and the silence of the airport was deafening.

About 1.5 miles is the Jefferson Memorial (left of the mineral spirits can).

2013_04_16_15_57_12_AWB-029

The US Capital is between to the two cans along with the Potomac river below

2013_04_16_15_57_32_AWB-027

Oh yes, and the shelve too!

2013_04_16_15_58_48_AWB-023

Washington Reagan Airport with the Potomac beyond is a close neighbor too. Amazingly planes are not too noisy, it’s the nearby trains that sometimes irritate! When they do, we just look at the river and wonder where Magnolia is going to take us!

2013_04_16_15_59_02_AWB-022

2013-04-19 Hatch Installation–CHECK!

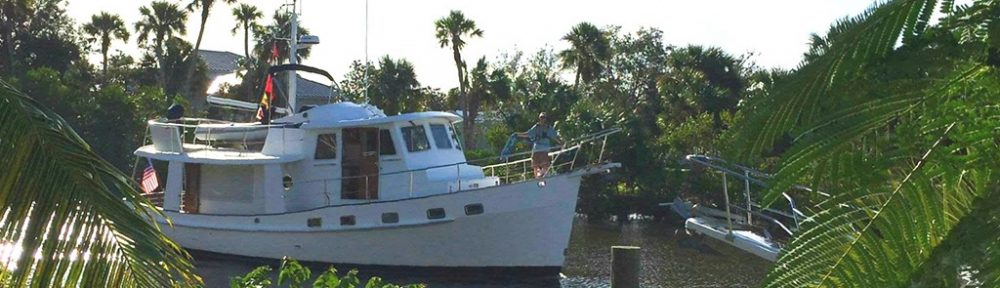
In preparation for launching Magnolia this week, “Material Condition Zebra” has been set! Material Condition Zebra is the Navy term for configuring hatches and valves in such a manner to make the ship water tight as possible.

Magnolia has 11 deck hatches in over this last winter they were shipped to Select Plastics in  East Norwalk, CT in groups of 5. Turn around time approximately 5 weeks and the work was completed as promised and on time. They replaced the lenses, gasket seals and performed other maintenance as required.

I used a Butyl tape to provide a gasket seal for the frame and individual screws. I applied 3 –4 layers of tape to the frame leaving the backing tape to the last layer applied.

2013_04_19_10_22_02_AWB-020

I also applied a wrap of Butyl tape to each of the screw heads. I was able to complete the application of the Butyl tape at home. The screws were placed on wax paper for easy transport to Magnolia for installation.

2013_04_19_10_32_04_AWB-017

Once “onboard” I used an ice pick to punch a hole through the Butyl tape and the backing tape. Yes there was a drop of blood shed as can be seen. Come on, you give me an ice-pick I am certainly good for at least one wound!

2013_04_19_11_28_28_AWB-012

I then used a couple of ice picks to align the frame to the mounting holes BEFORE removing the backing tape! BEFORE removing the backing tape!! You have been warned!

2013_04_19_10_29_36_AWB-019

Once the holes were all aligned the backing tape was removed the the individual screw inserted. Do not press down the frame firm yet.

2013_04_19_10_43_08_AWB-015

The frames were checked for any gaps and an additional bead of Butyl tape for pressed under the frame for using an ice pick.

2013_04_19_11_02_44_AWB-013

The secret to successful use of Butyl  tape I am told is slowly compressing the seal. I gently snugged up all the screws applying equal compression all around to the Butyl tape. I will repeatedly snug the screws down during our next couple visits to the boat.

In addition to getting the hatches installed, Annette cycled and ensured each of the thru-hull valves were left in the closed position. With that, Magnolia is ready for re-launch this Thursday!!

2012-04-16 “Single Digit Midget” & “Nearing Splash Time”

As you can tell from above I made it to Day 9 in my “Stop Work Countdown.” It is hard to believe it is nearly here. I remember 500, that we celebrated in the Bahamas on a sailboat. I remember 100, that was in BVI also on a sailboat. Lots of mixed emotions as time winds down. It has been a great experience and the opportunities unconceivable to a kid from Detroit. Going to sea on this countries First Aegis Cruiser, Ticonderoga to helping come up with a way and shoot down an errant US Satellite to now the most challenging job, Captain of Magnolia.  Thankfully I have the Admiral to share this one with! Enough history, the future looks bright and we are so very grateful for the opportunities!

The Hartge Yacht Harbor is scheduled to put Magnolia back in the water on the 24th of April so it has been a race against the calendar. We are certainly not winning but seem to be keeping up! The legendary hatches are expected to arrive this afternoon. We need to apply Butyl Tape (like caulk but a lot less messy) to the frames and then I will start installing them on Friday.

In the meantime there has been a bevy of activity onboard!

007 

The “ceiling” has been fully installed and varnished. The match is better than I hoped and did not require tearing out the entire bulkhead so that was good. There is shelving to be re-installed that covers most of the bulkhead so I think in the end you won’t even notice the difference in the wood.

001

003

The settee cushion’s were back for a dry fit and George Whitehead of Captain Canvas did a fabulous job with the Ultra Leather. The Admiral tells me the stuff is bullet proof and nearly stain proof. If I ever come up missing, you can assume I spilled something on the settee and was “eliminated” by the Admiral!

20130413_124100


20130413_132336

Not nearly as fun as Ultra Leather, but the aft cabin hanging locker is being converted to shelf friendly at the direction of the Admiral, Captain concurs of course! The Admiral suggested Wire Rack Shelves but I initially resisted because of  how to make them work with a curved which backs the cabinet. I will build some suspense with the answer cause I think it might be one of my best ever ideas! In the meantime I used some left over oak threshold material for supports. I used some thickened West epoxy to attach them to the exposed hull fiberglass. After some primer and paint they will be ready for that surprise shelf solution so standby!

2013-03-26 Day 30 & Critical Path Crunch

I know it has been a while since my last post but that should be not be taken as an indication of tasks not being completed! The big speed bump on the “critical path” to getting Magnolia underway for Memorial Day Weekend (our short term goal) is getting the cabin top hatches back from overhaul and re-installed. Obviously we can’t remove the shrink wrap until the hatches are re-installed. In addition we can not finish sanding the the port side toe rail until the shrink wrap has been removed. That leads to not being able to varnish the port side toe rail until it has been sanded. If you can not varnish the cap rail you certainly cannot install the life line stanchions on top of the toe rail. If the lifeline stanchions cannot be installed, you cannot measure for the new lifelines. If you cannot measure for the new lifelines, cannot order new ones from the fabricator. Until you order new ones, wait for fabrication and then install them, we you cannot go sailing (safely) on Memorial Day weekend…  See how those hatches are holding everything up?

2013_03_02_12_49_38_AWB-002

Admiral over seeing hatch removal

In the mean time we have taking care of all those onesy and twosys tasks. Annette has completed making all new curtains, duvet for the bunk and a plethora of very cool throw pillows. George (ZZ Top’s twin) has finished the cockpit enclosure and called last evening to let Annette know the Settee Cushion recovering is complete. (If you need a canvas guy, George is GREAT!) Bayshore Marine has finished the engine and generator maintenance and Shiver Me Timbers should finish the refrigeration this week. I still have some glue, varnish and shelf installation in the aft cabin but there is time for that!

Bottom line, things are coming along as best as we could hope for! As soon as we can get the hatches off the Critical Path, we will have much better control of our destiny!!


2012-03-09 Yup, and wood too!

You have to hand it to that “Jack!” “He is like a Jack of all trades and a master on none!” The one thing  he does pretty well is wood and that exactly what I got to do this weekend. Here’s “Jack” taking a little mid job coffee break and enjoying a day on the boat since the temperatures were well into the high 50s, what a treat!

005

I have never been a mechanical person, pretty good understanding of electrical but little practical experience but wood is definitely my medium of choice. I did not think about it till this moment by if you want to get a well rounded skill set get a boat! This winter I have done a little bit of everything!

For some reason, beyond my level of understanding they call the wood strip on the horizontal bulkhead ceiling. As I said above I know a little about a lot of things and even some rocket science but why they call stuff on the wall ceiling, well that is what we call in the trade, “black magic!”

20130210_131311

Now this is simply pedestrian wood work, not like pulling up a cap-rail like Dani did on S/V Sundowner! The job started with having some Ash lumber milled into strips and then using a hand sander I rounded off the edges to similar style as the existing ceiling.

007

I don’t have an adjustable miter box so after making a template and giving thanks the after bulk head was a consistent angle (about 56degrees) it was a pretty straightforward job to cut and fit

008

The boards are just dry fit right now, have to wait a couple more weeks until temperatures are a little more consistent before I can glue and finish them.

2013-03-06 Hatch Mania–A Race Against The Calendar

All of our hatches have crazing in the lens and the though only one had a real leak this is likely the last winter under shrink wrap for a while so if hatches are to be pulled and rebuilt this was the year and the best time to do it. The trick is to get all the hatches removed, repaired and re-installed before the shrink wrap comes off! Being a complete “newb” I started small and worked my way up.

I removed all the screws and then used a flexible paint scraper to slide between frame and cabin top. I was able to slowly work my way around the caulk gasket. The further I worked around the hatch the quicker it went.

2013_03_03_12_34_54_AWB-009

I then used my Porter-Cable Multi-Tool (thank you SO MUCH Jack Tennar!) with scraper blade attached to removed most of the old caulk. Using a industrial grade green scratchy pad from Home Depot I had the mounting frame cleaned up in no time.

2013_03_03_12_53_10_AWB-010

Unfortunately I do not have any pictures of cleaning the actual hatch frames but I used a narrow paint scraper to get off the big chunks and the a Wirebrush on my drill that cleaned the frame ups really nice.

Am currently running the hatches through Select Plastics in batches of 2-3. I ship them and they are returned with a new lens installed along with all new gaskets as well. We are using Butyl Tape rather than LifeCaulk. The cost is more but the ease of use is amazing. It is probably just me but if I get neat LifeCaulk the stuff ends up EVERYWHERE! I am just hoping in the end Butyl Tape is everything it is claimed to be!

We used 3 layers of tape around the base and wrapped a small amount around the screws just below the head of the screw. I found that it was best to drive a hole through the tape prior to placing the screw and allowing the screw to make the hole. Using the screw to puncture the tape deformed the tape more than I liked.

2013_03_02_13_19_50_AWB-003

Now we just have to wait for the shrink wrap to come off and that first rain storm for the leak test! Wish us luck!

2012-02-09 Jack’s Work Is Done For Now (Part IV)

Well Jack completed the last of his current assignment today with the installation of the tank/bladder vent. Jack used a 1 1/2 inch vent line out of the bladder downsizing to 1 inch once the line passed through the bulkhead into the lazarette. Yes, the clamps are arranged like that on purpose, I am wanted to make sure nothing sharp was near the bladder tank!

20130209_121747

The vent passes into the lazarette and to the downsized 1 inch vent line. I used plenty of thread sealer. Last thing you want is a Black Water leak! (Note: Need to give the lazarette a good cleaning!) I am going to make a protective cover for the fitting to make sure a heavy anchor or other object does not strike it.

20130209_102240

Here is a picture with “protective” cover in place. I used a 4 inch piece of PVC. Cut off one side of the pipe and used some aluminum strap material to attach to the bulkhead. Its on there pretty good but still need to be careful with spare anchor!

20130216_105747

The vent line finally exits the stern. The larger vent line was used so that it could it could easily be flushed at with a fresh water hose.

20130209_094842

2013-02-03 Jack’s About Done?? (Part III)

Anyone who has “head” on their boat knows, Jack is never really done!!! Lets just say this particular project is nearly complete…for now.  “Jack” last left us with all the plumbing, pumps and valves installed. The remaining tasks are to add a vent fitting to the waste tank (yea it never had one) install the tank and plumb the vent to the outside.

20130202_104933

The tank vent line will exit the tank locker into the after lazarrette (which is Magnolias huge trunk) and then out to the stern.

20130202_113416

I installed a double threaded bulk-head fitting so hose fittings could be fitted and maintain the bulkhead’s water tight integrity.

20130202_124808

After cutting the bulkhead into the lazarette it was time to cut the hole from the stern into the lazarette. This is the one that made me nervous since I had to cut through the hull and was afraid the gel coat would chip. I used plenty of tape on the gel coat and a tungsten tipped hole cutter.  

20130202_125127

As can be seen the everything worked just fine. I used another bulkhead fitting here so we could easily flush the vent with a garden hose as required. Still have to reposition that starboard vent!

20130202_123022

While I was spending quality time in the lazarette I installed some hooks to hang our emergency anchor rode. The hooks started life as Harbor Freight ladder hanging hooks. My hacksaw and I modified them just so!

20130203_105139

Annette and I installed and additional fitting that will be used as a vent. I still need to finish plumbing the vent line but that will be next weekend when “hopefully” it is a bit warmer.

2013-01-07 — The Tale Of Black-Water Jack (Part II)

Tunnel Vision is a dangerous thing. Not living aboard gives us plenty of time to visualize how something is going to work. I spend days before getting to the boat making diagrams and “imagining” how a cable, wire or in this case a hose is going to be routed. Sometimes having it worked out  in your brain before hand can be a determent. Take the below example. Before I installed one valve or hose I “knew” how it was all going to go together. As you can see hose is bent this way and that way and routed here and there, all because I “knew” how it was going together. Granted the moment I looked at the below I was not happy, but it was right all because that is how I “knew” it would go together.

20121229_133742

Capture1

After a week away from the boat I came back and realized immediately if I swap the connections on the Y-Valve and slightly adjusted the mounting of the valves I would have a much much cleaner installation with less hose and less bend in the hose. So much happier I was finally able to get my eyes outside the tunnel! Below you can see the same re-configured cabinet!

20130105_130515

Granted the functionality of the system did not change at all but I wanted to try and align the functional drawing a little better to the physical so that when I am old and grey I have half hope of understanding how this thing is suppose to work.

Capture2

With Annette’s help we pulled the remainder of the hoses and installed the sanitation pump that will be used to empty the bladder/tank.

20130105_130448

Below is the freshly sealed and painted tank locker. Part III will be installation of the vent fitting planned for the back of tank locker.

20130105_130454

2012-12-30 — Black-Water Jack Does Windows Too!

We had to order sanitation hose so that left today open to take on another project that has been waiting in the wings. Hatch restoration. Sailboats are notoriously dark so as much light as you can get “down-below” is all the better. The “windows” in the hatches are made out of plastic and after some years they become crazed and look unsightly. In addition the gaskets wear out eventually as well. We have old Lewmar Rollstop Hatches which they only made for 4 years so that should tell you something! They are what we have and because of their unique sizes it is not economical to replace them. That said the best we can do is have them rebuilt by the experts at Select Plastics. 

All things considered this is the perfect time to have the work down in that the boat deck is completely covered by the shrink wrap. On a sunny day like today it makes it completely comfortable to work on deck even when like today the temperatures were in the mid 30s and wind was gusting in the 30-35 knt range! The whole time I was working in shirt sleeves!!

20121230_105324

I previously made an emergency hatch cover for each of two sizes of hatches. (2 & 4) In case of heavy weather and a hatch failure we would be able to prevent a huge amount of water from entering the boat. In addition I made them with carriage bolts only being exposed do they would provide some level of security if I needed to use them in non-emergency situations such as this. I should have take a picture from below but there are basically oak cross members cross the hatch frame below with wing nuts holding the carriage bolts.

20121230_125333

20121230_105509

After taking the all screws surrounding the frame of the hatch it was a relatively simple matter to separate the frame from the deck suing a Plastic/Rubber tipped hammer and paint scraper with a sharpened edge. BTW – If you do not have one of these hammers, go get one now. My buddy Greg Rodgers turned me on to this one and it is no much better than a standard hammer on a boat. This hammer has saved me from inflicting real damage on Magnolia so many times!!!

20121230_110204

Here is the aft hatch removed and all battened down with the emergency hatch cover. I will have to add a picture of below but the underside has cross members just like the top which makes for a very solid installation. (1/2 inch plywood and oak cross members all with a coat of 2 part epoxy)

20121230_125847